Thursday, April 24, 2014

LA Times Festival of Books

books for sale

I went to the LA Times Festival of Books for the first time this past weekend (conveniently located right on USC's campus, AKA my front lawn), and I had a wonderful time. I honestly wish I could have spent more time walking around and checking everything out as there was so much to take in. The weather was perfect for walking around the entire festival-everything from the book vendors to the food trucks, and everything in between, including the John Green's book signing line.
The festival was primarily comprised of various tents with vendors, primarily selling books, comic books, and other book related items, along with large stages set up for performances, talks, and panels. I briefly looked through the kid's area which had tons of families and children-the Natural History Museum and an ice cream truck. 
My first stop was at The Library Store truck which was full of cute souvenir-type items like Jane Austen tattoos and air fresheners (also found at the Jane Austen Society's booth) and these little zipper pouches. There's loads of merchandise at all of the tents other than books that are quite tempting to buy, and, while I thought limiting myself by only bringing some cash would be smart, most of the vendors take card as well.
I didn't get any pictures of the tons of food trucks that were there, but there was everything from boba to Thai food, funnel cakes to paella and everything in between. The lines were crazy long so I didn't get anything, but it all looked and smelled delicious. Instead of getting food I decided to jump into an even longer line for John Green's book signing. 
John Green
I didn't even realized he was going to be at the festival, let alone signing books, so upon discovering the book signing area, I ran and bought a copy of The Fault in Our Stars (the only thing I bought) and got in line. It took a good hour and a half, but luckily the weather was nice and I made friends with the person waiting in front of me. The book signing was probably one of the most popular events at the entire festival, so meeting him was pretty brief, but the wait was definitely worth it.
I got my own J scribble!
I found a lot of fun random merchandise among the hundreds and hundreds of books. One of my favorite finds was this Sherlock Holmes lavatory spray.
I also came across these handmade leather journals (the guy at the booth said it took him a couple of hours just to make one!) and some pretty handmade jewelry. 

Tote bags were also a popular item 


Thursday, April 10, 2014

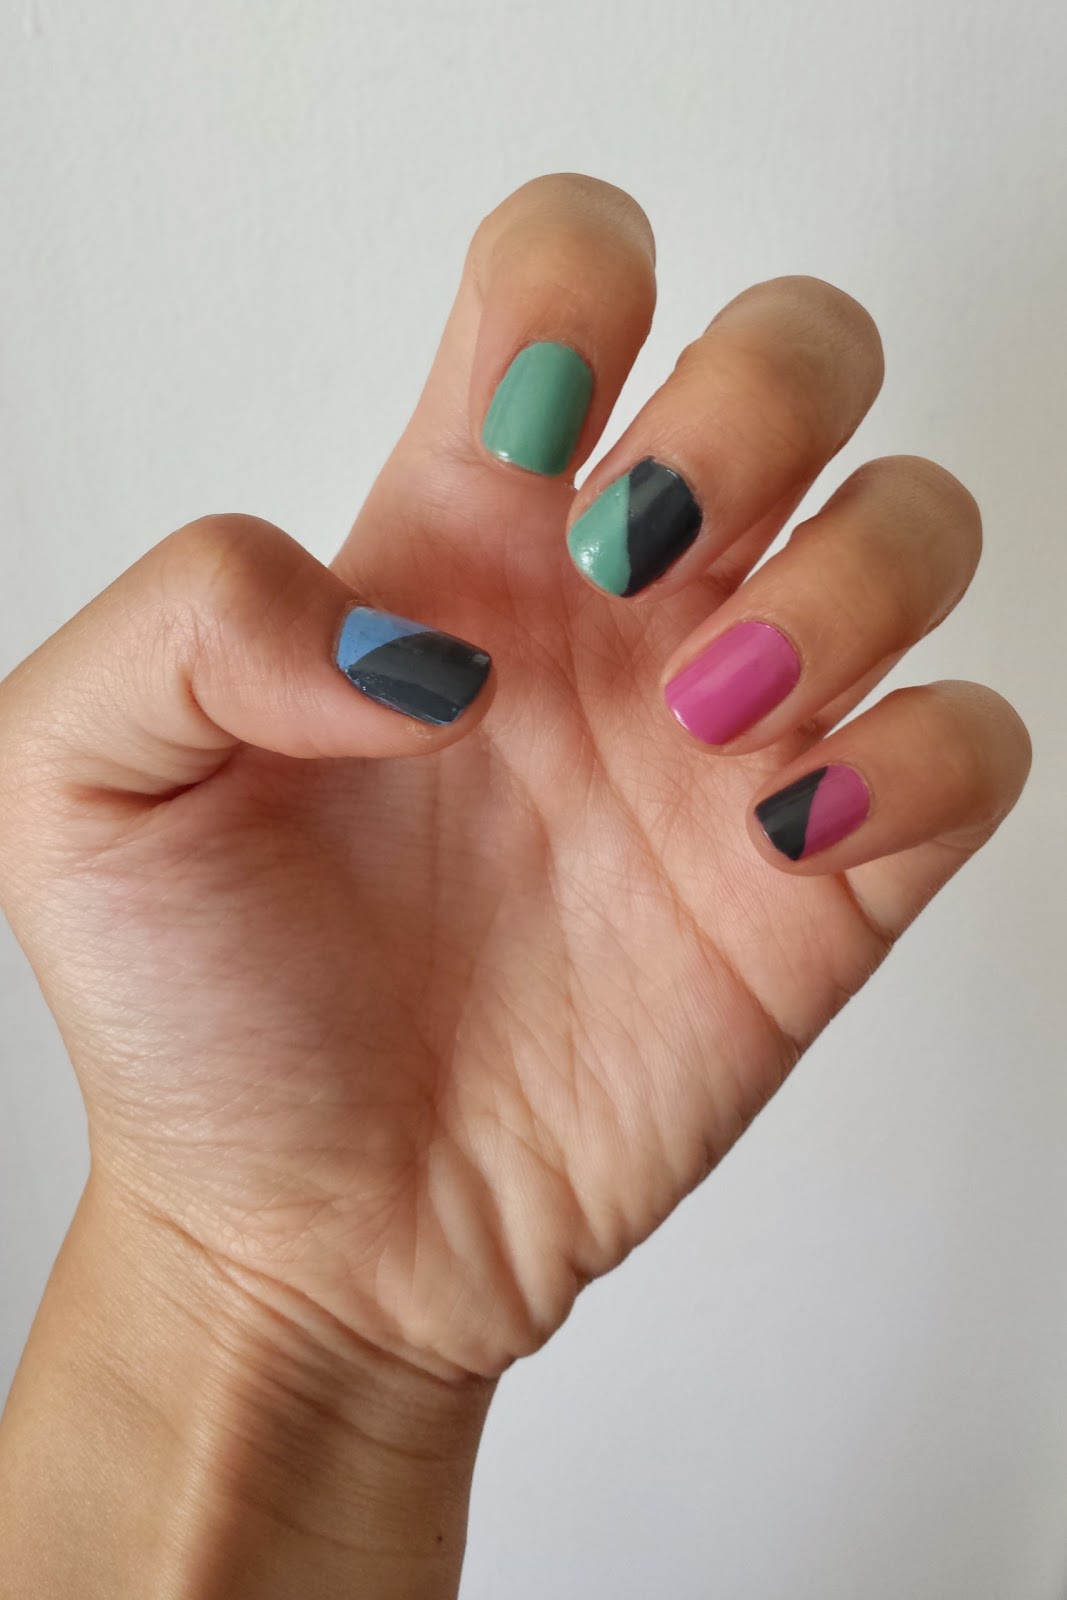
Spring Nails-Pastels and Simple Geometry

pastel spring nails

Some rather simple nail art I did using some of my favorite spring colors and my favorite gray nail polish. I simply added the gray triangles on after painting on the base colors by first making a diagonal stripe from one corner to another and then filling it. It's a little tricky to do free-hand when you're using your non-dominant hand, but I've had success in the past using pieces of tape as a guideline, making sure to remove some of the tape's stickiness first and allowing the base coat to fully dry. 

essie, sephora, and hello kitty nail polishes

The colors I used are Break a Leg-Warmer by Sephora by OPI, Splash of Grenadine and Turquoise & Caicos by Essie, and Blueberry from the Hello Kitty line at Sephora (possibly discontinued?), all colors with cream finishes. Blueberry and Break a Leg Warmer have great opacity while the two Essie nail polishes seem to need at least two or three coats each.  I used Sally Hansen's Diamond Strength top coat in Flawless to finish off my nails. 

pastel nails

Saturday, April 5, 2014

Pink and Green Macarons


Using this Martha Stewart recipe, here are some pictures of pistachio macarons and regular pink macarons with raspberry jam filling. The pistachio ones were made by replacing 1/4 cup of almond flour with finely ground up pistachios and added green food coloring.

Almond and pistachio flours. I definitely recommend sifting everything as many times as the recipe says-it really helps.


Left over ground pistachios were used as a topping for half of the green ones.

Mini macarons for fun.


Out of the oven.


All paired up.


Tuesday, March 25, 2014

Zip Top Pencil Pouch-DIY

Inspired by Kate From See Kate Sew's knotted zipper pencil pouch tutorial, I made a simplified version of her pencil pouch without the knotted ends. My old pencil pouch has had some holes in it for a while, so I've been long in need of a new one, and this one was very simple easy to make!
I used the remained of a fat quarter of fabric and some scraps of black knit cut from the sleeves of a t shirt. Start off with two rectangles of each the lining and outer fabric, about 9x5 inches in dimension (which can be easily varied depending on the size of the pouch you want).
Cut one of each of the rectangles in half lengthwise so you have a total of 6 rectangles.
Coats & Clark All Purpose Zipper-Joann
I used a 9 inch zipper to go down the middle of the pouch. (I used one of Joann's abundant coupons, although zippers are cheap enough without one, <$3)


To sew the top half of the pouch to the zipper, lay it face down on the outside fabric (top left) and sandwich it with the lining fabric, the zipper should be completely concealed between the two. Sew along the edge as close to the zipper as possible (it will end up looking like the top right picture). Repeat on the other side of the zipper and you'll end up with something like the picture above.

I ironed the fabric flat and did some top stitching to finish off sewing the zipper.
Then sew on the back lining piece to the lining attached to the zipper. You only need to sew down the long sides, making sure to leave an opening on one side for turning it out later (marked by the pins on the left hand side). Make sure the zipper is partially unzipped before sewing the outer pieces together.
Next sew the outside pieces right sides together. I first sewed down the long sides, making sure to only sew the two pieces together. For the shorter sides, sew the lining and the outer fabric together.
Lastly, turn the pouch right side out through the gap left in the lining and the zipper, pushing the corners out with a pen or something similar. Sew up the hole and you're done!


Wednesday, March 19, 2014

Red/Black/Gold Nails


Simple nail art with a diagonally striped accent nail. I used a red China Glaze nail polish and Blackout by Sally Hansen (the gold I borrowed from a friend, I don't know what brand it is!). On my ring fingers I started by painting them completely red, then adding a black triangle, and then topping it off with the gold triangle, letting it dry in between.